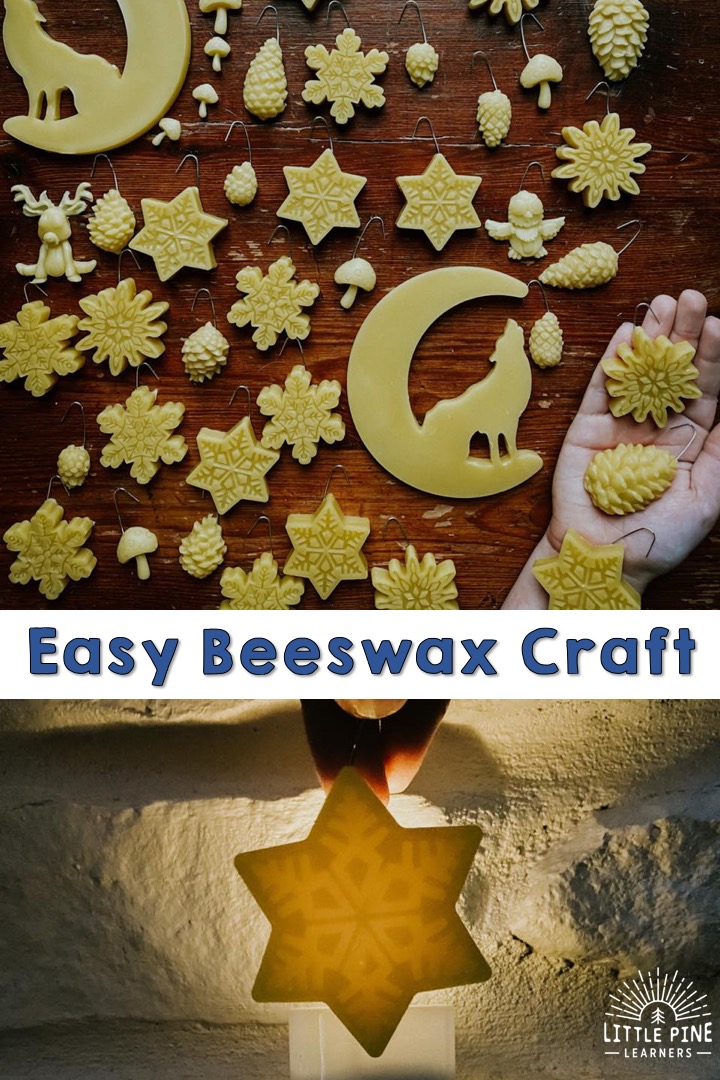
This beeswax craft is so fun and easy to make! These are versatile decorations and can be made into beautiful Christmas ornaments or turned into a sweet garland anytime of year. They are strong and can be handled by little hands!
This beeswax craft was 100% inspired by a gorgeous post on the Facebook group Wildschooling. I saw a beautiful photo of these beeswax decorations and knew I had to try it for myself! I headed straight to Amazon and searched for cute silicone molds to test out. My boys absolutely LOVED making these with me and were so proud of their beeswax creations!
Ready to make a beeswax decoration or two? Here’s what you’ll need….
Supplies for the Beeswax Craft:
- Beeswax– I like this brand of yellow pellets.
- Mini Crock pot– I have a mini crock pot designated for beeswax crafts! We use beeswax quite a bit, so when we are done using it I just let it harden in the Crock Pot and save it for another day. This seems to be the perfect size for all of my beeswax crafts. I don’t suggest using one that is bigger because you will need to use A LOT of beeswax to fill it up. I purchased my Crock Pot at a second hand store, but it is also available on Amazon. If you don’t want to invest in a Crock Pot, many people use a double boiler for this craft.
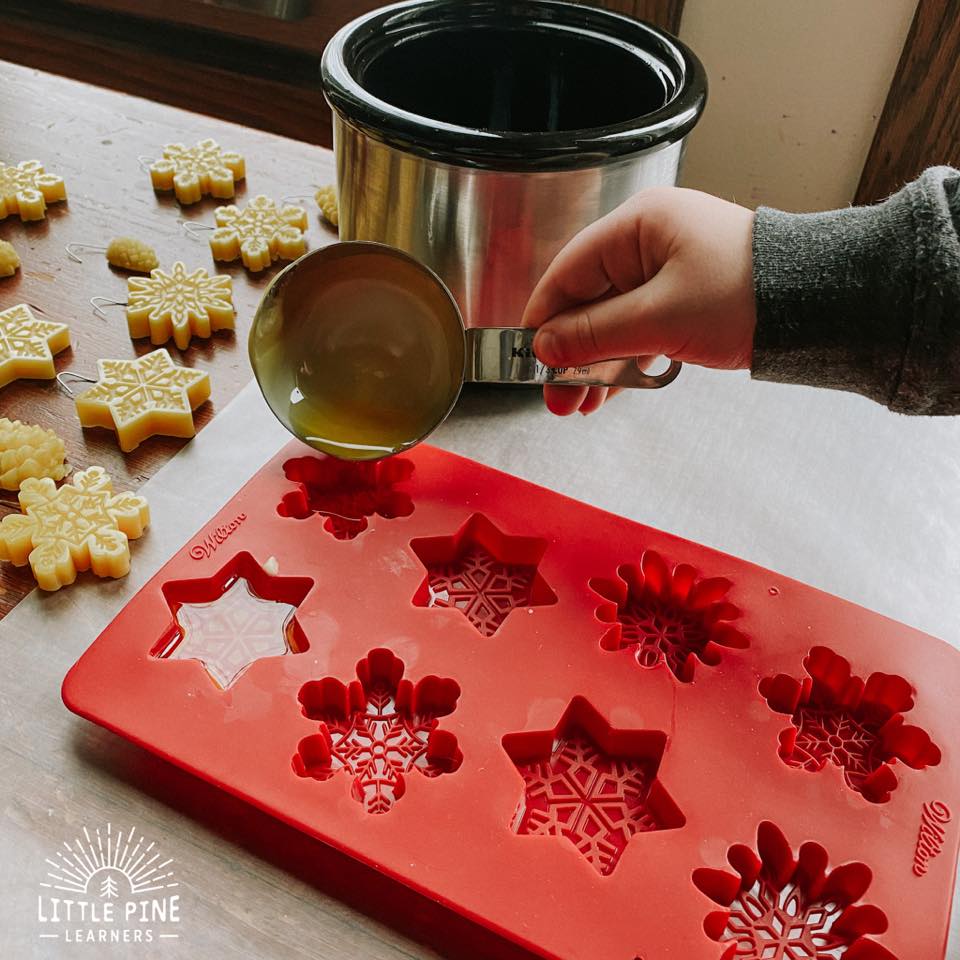
- Something to help pour the beeswax. We designated a metal measuring cup for beeswax activities.
- Hangers or string
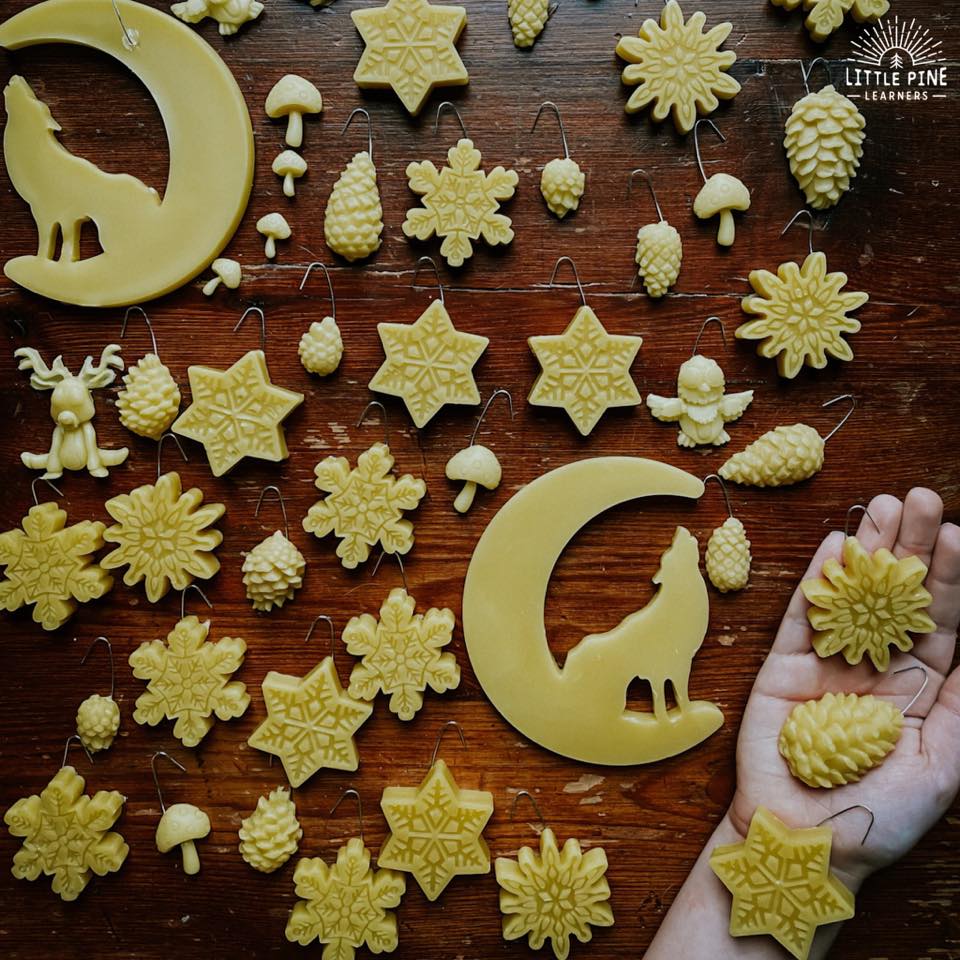
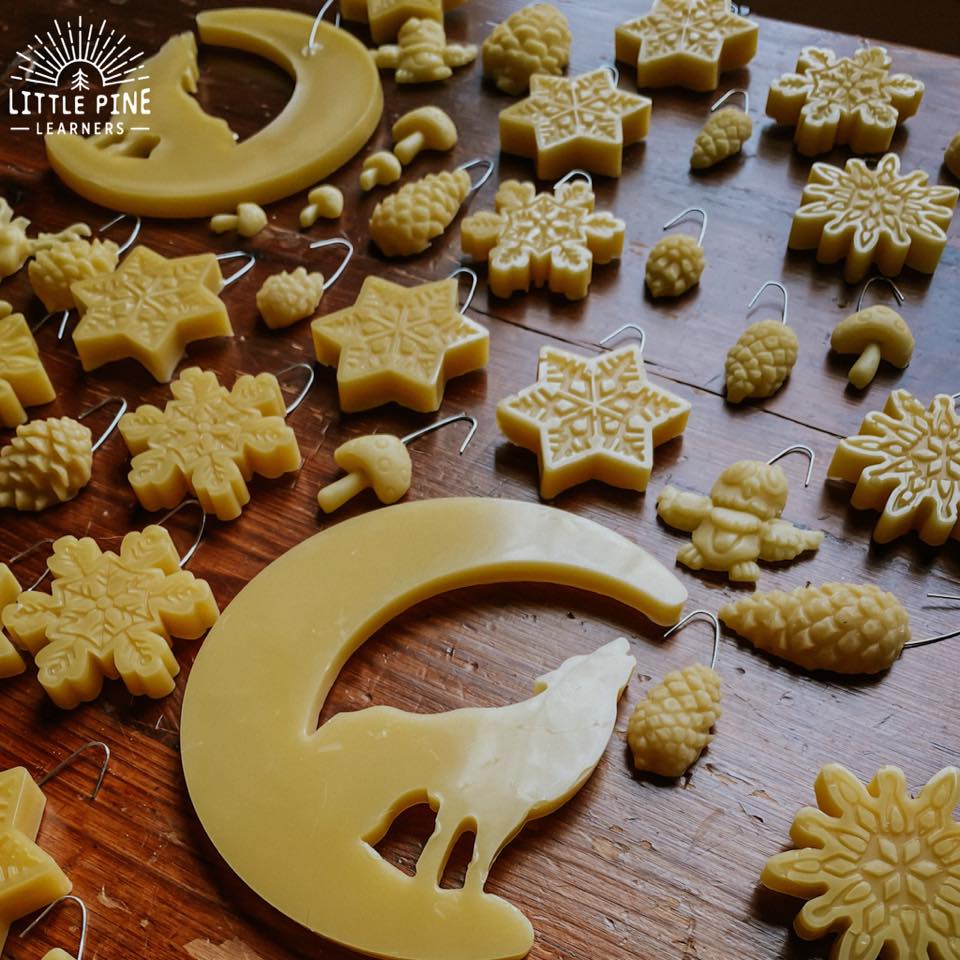
- Silicone molds, here are a few that I purchase- Crescent moon and wolf, pinecones, snowflakes, forest animals and mushrooms (These are REALLY small, but a few of them worked) We are waiting on this sun/moon mold! The fun thing about molds is you can choose whatever figures you want depending upon the time of year and your interests.
This post contains Affiliate links for your convenience.
RELATED: Check out Rolled Beeswax Candles That Kids Will Love!
Here’s How We Made Our Beeswax Craft:
First melt your beeswax. I like using a Crock Pot for this craft because it’s safer than on the stovetop and I feel more comfortable with my boys helping!

Step 2:
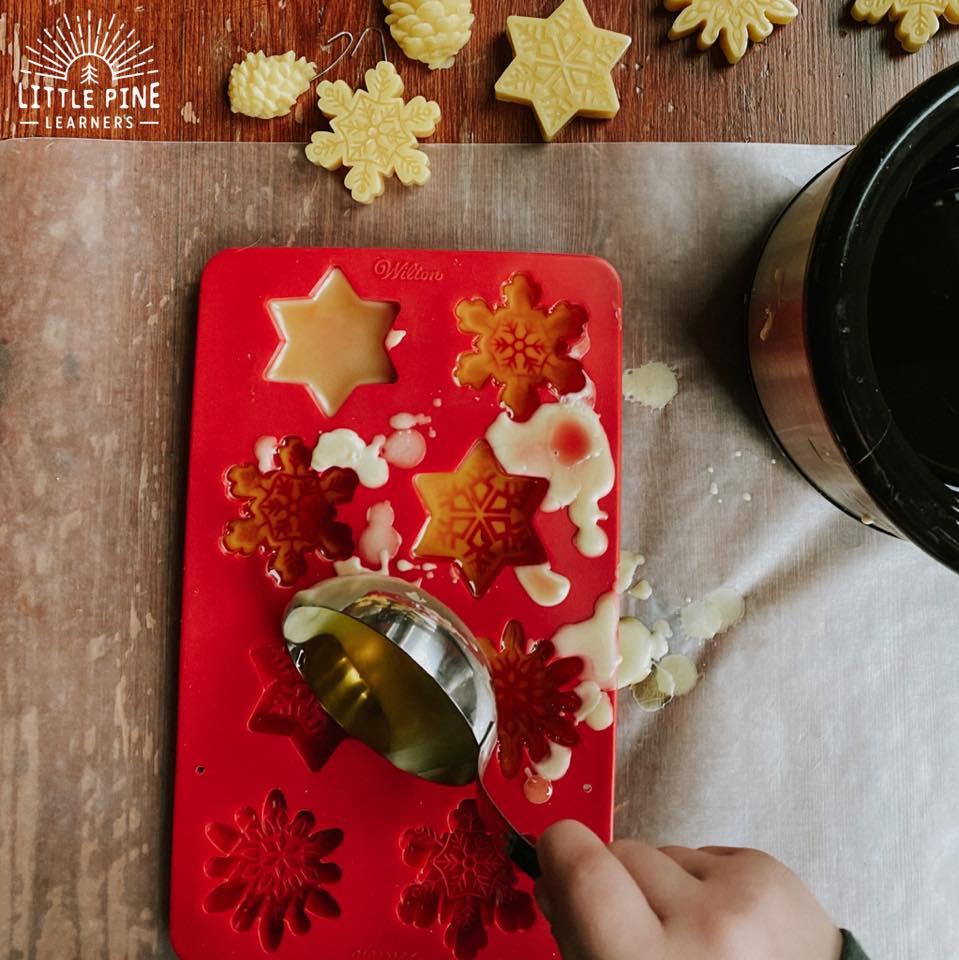
Once your beeswax is melted, ladle the liquid into the molds. Be careful, the beeswax is very warm! My boys are comfortable working with beeswax because we use it so often and I’m always right there with them.
Don’t worry if you spill beeswax on your silicone tray because you can easily pick it off after it dries. Remember to toss it back in your Crock Pot! It will melt back with the rest of the beeswax the next time you use it.
Step 3:
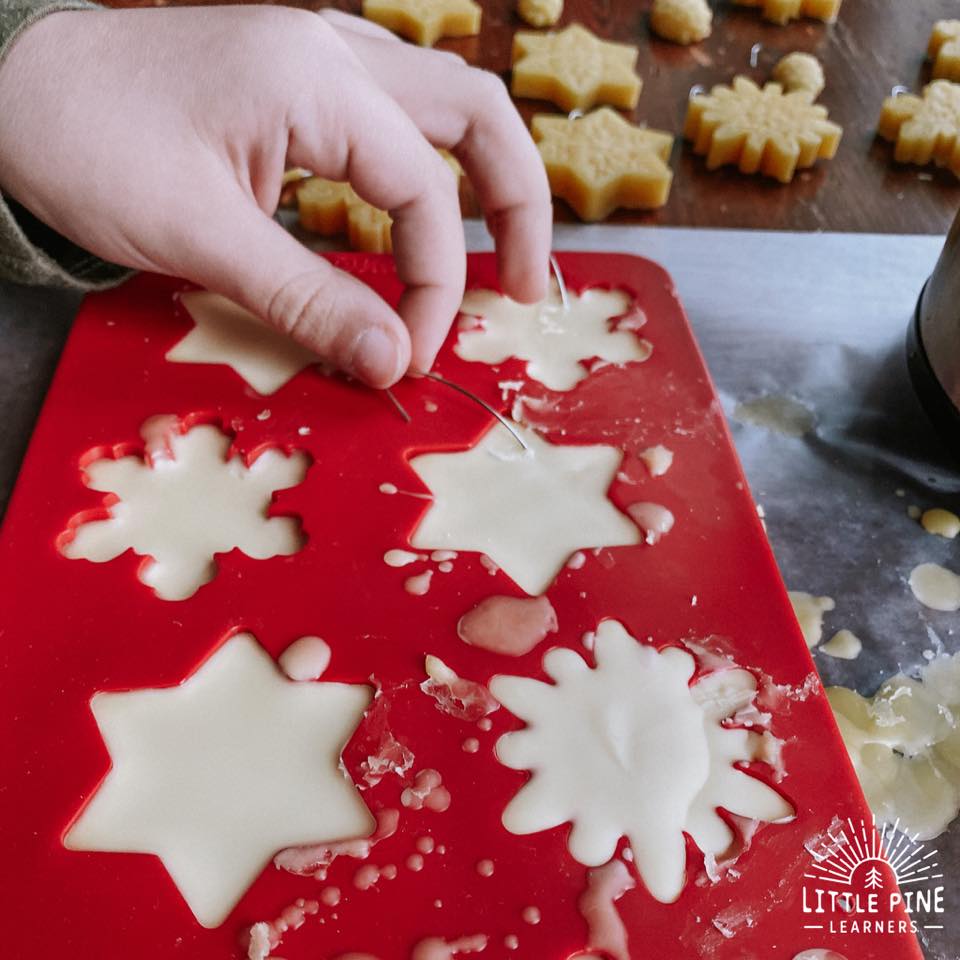
Let your beeswax dry for about 3-5 minutes. Just enough that it changes colors and the top layer is dry. Then gently poke your hanger or string through the beeswax about halfway into the mold. Don’t poke it through to the other side!
Step 4:
Let the beeswax dry for another 30 minutes or so. At this point, you should be able to pop them out and flip them over to dry a bit longer. The forest animal and mushroom molds required a little trimming with scissors. The molds are so small that the wax overflows. I just cut off the excess beeswax and they looked great!
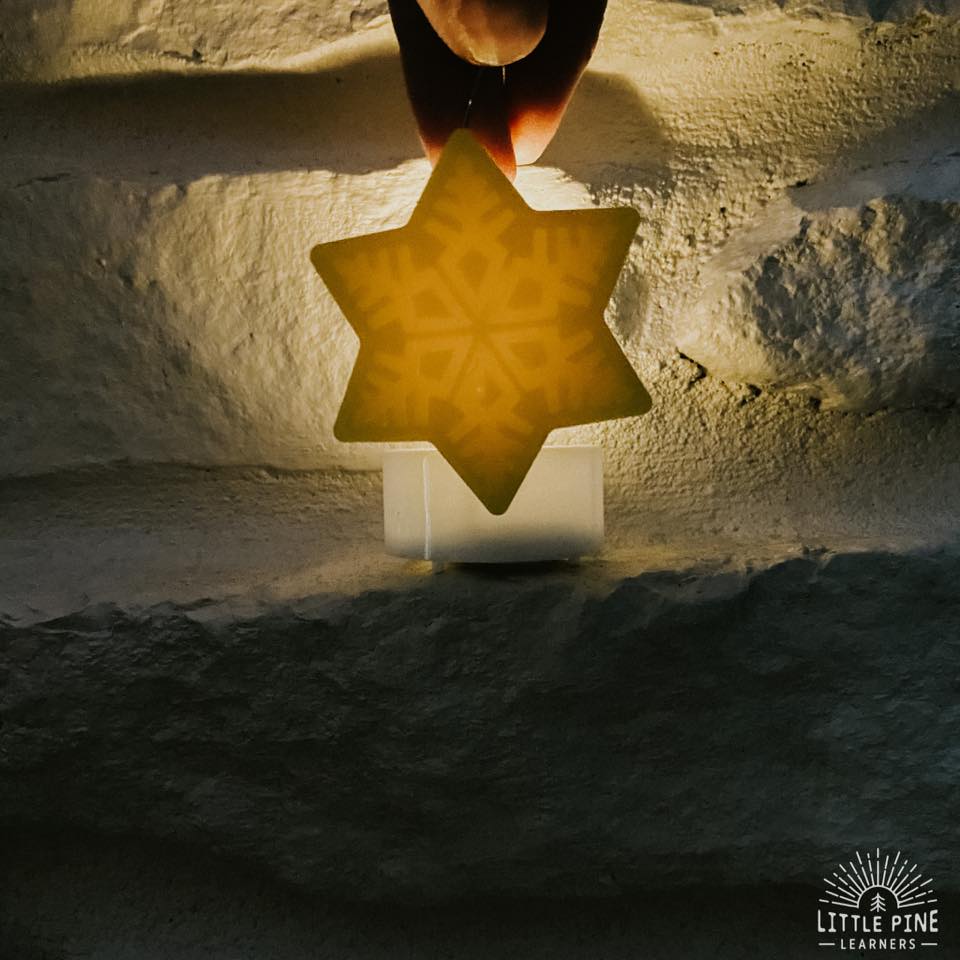
I’m trying to decide what to do with these beautiful beeswax decorations now that they are all complete! My boys love playing with them and hanging them on our Christmas tree, but that won’t be around for much longer! We might collect small branches from our yard, put them in a mason jar, and hang them on the branches.
Or we are thinking about hanging them on twine to make a pretty garland! I might wrap fairy lights around the garland because light brings out the beautiful detail in the decorations! Just remember, don’t put them near a fireplace or anywhere hot because they will melt.
Pin this activity to save it for later!
I hope you try this beeswax craft soon! I promise, your little nature lovers will love this beeswax craft as much as my boys.
∼Tara