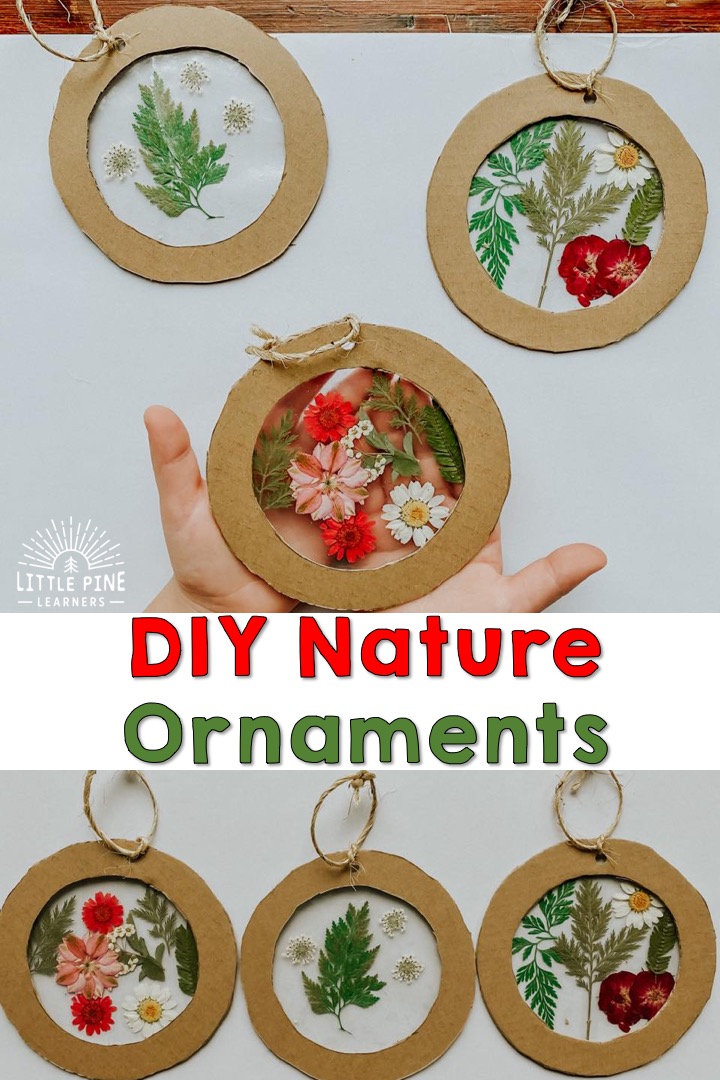
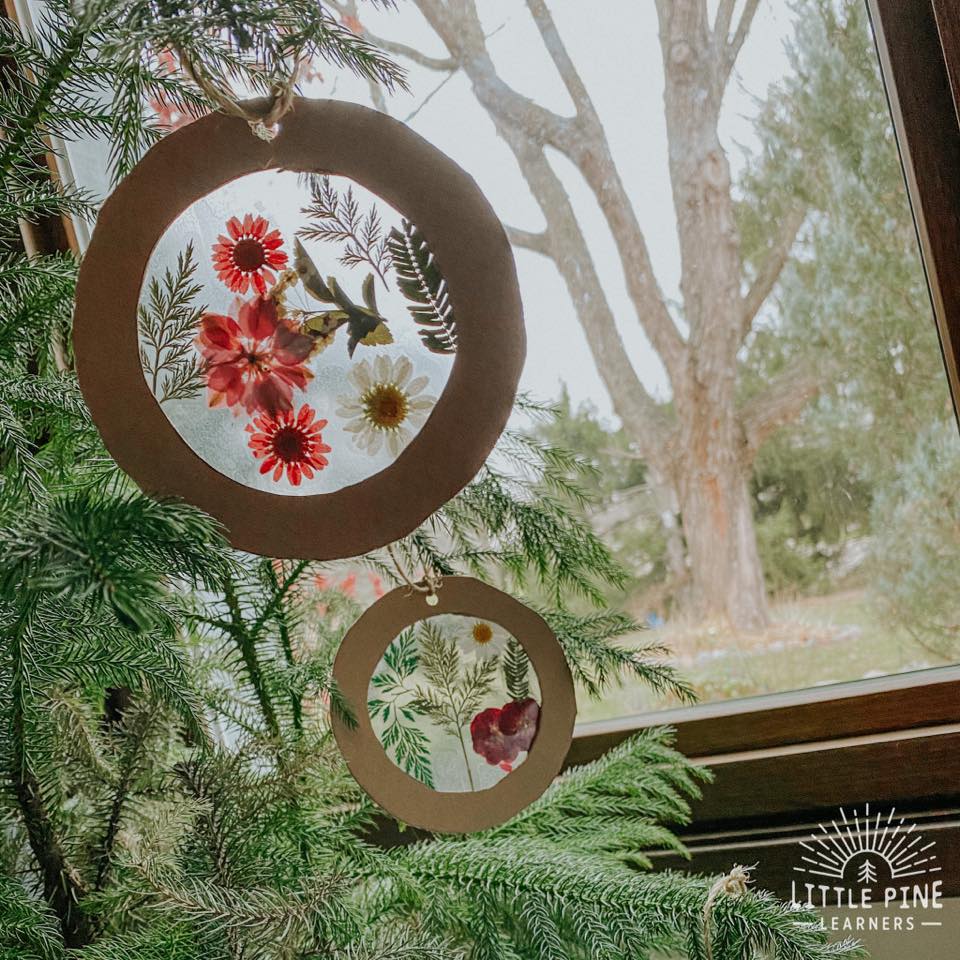
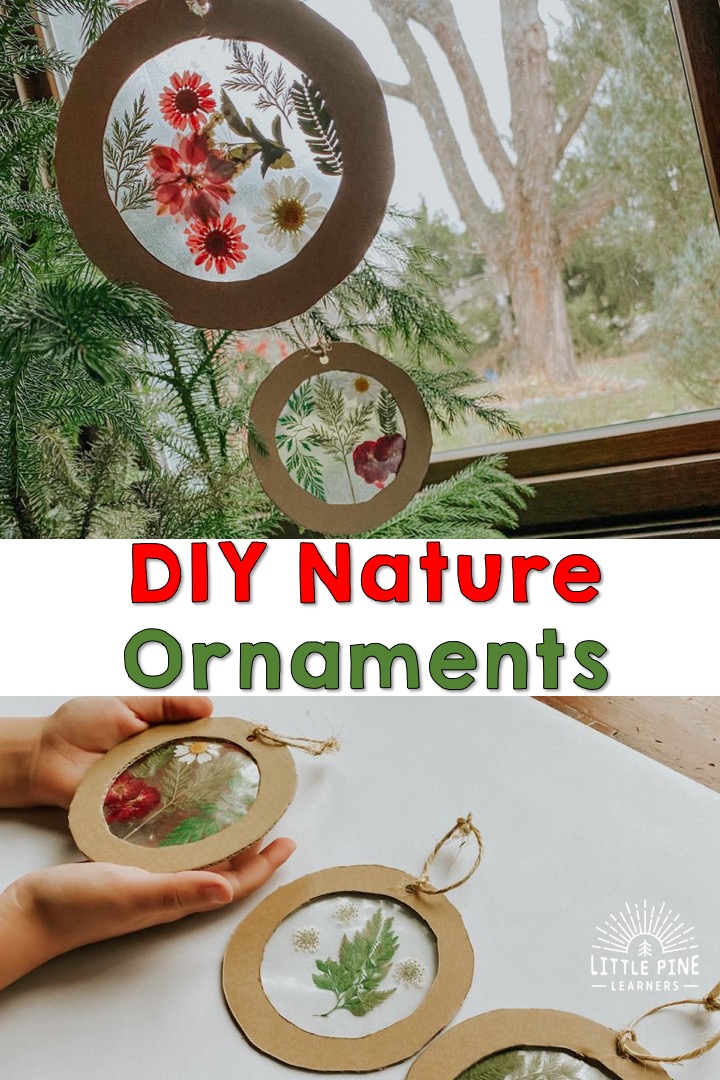
DIY Christmas ornaments are a special part of our family holiday traditions. These nature ornaments are so easy to make and are absolutely beautiful! Hang them from your tree and they make pretty sun catchers during the day and look so pretty with Christmas tree lights shinning through them at night.
We are a week away from Thanksgiving, so we’re already thinking about setting up our Christmas tree! Each year, we make special ornaments to decorate our tree. Last year we made these pretty pine needle ornaments, this year we are trying these beautiful see through nature ornaments!
Ready to make a few nature ornaments?! Here’s what you’ll need–
Supplies:
-
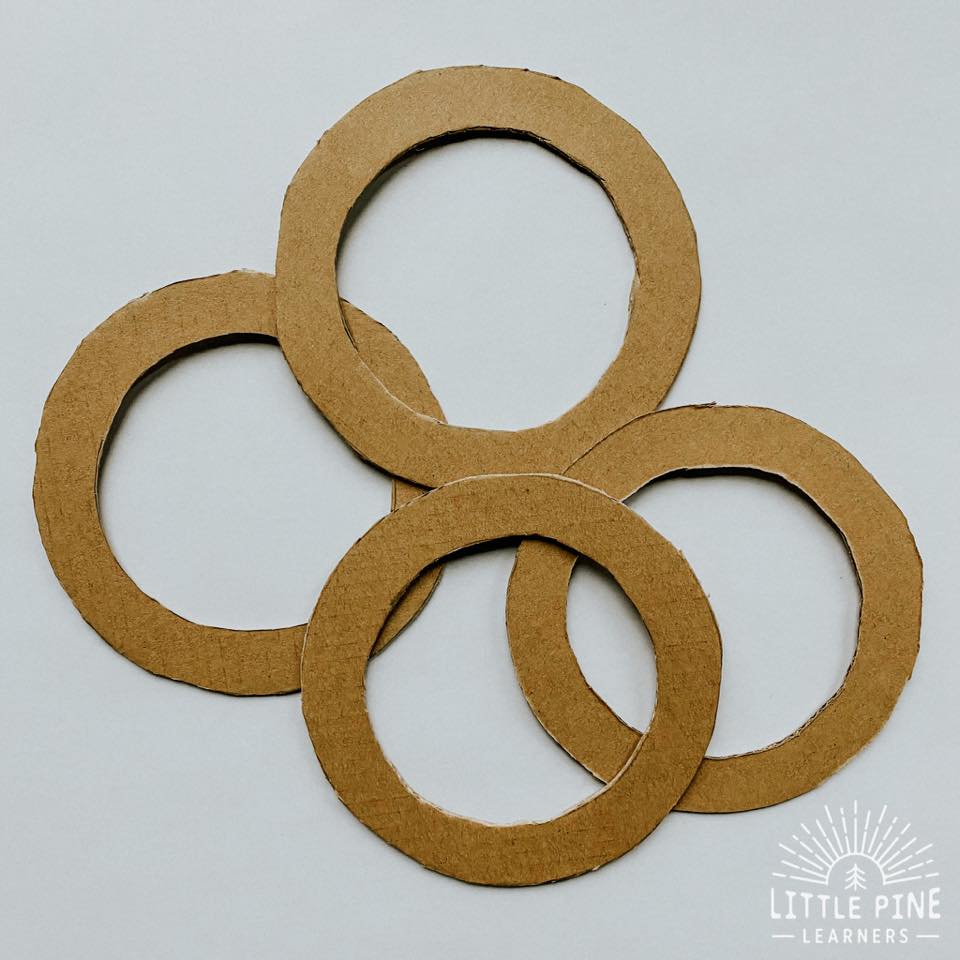
- Cardboard
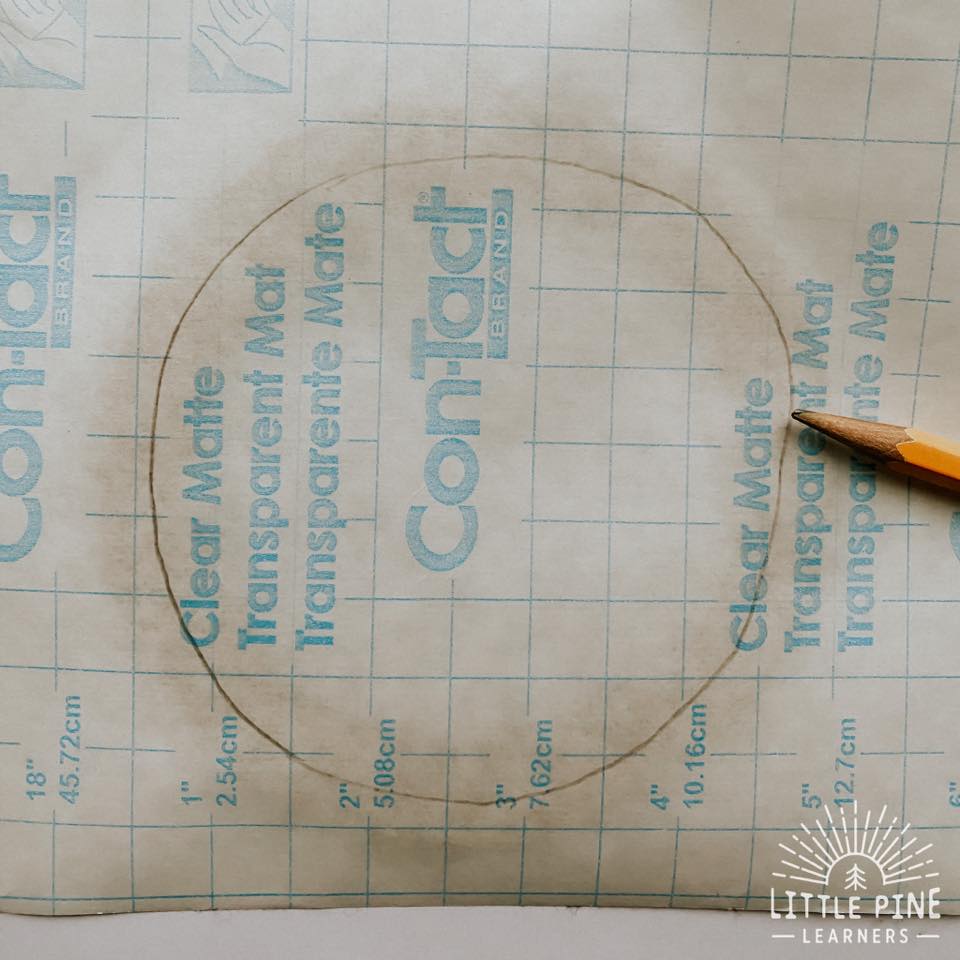
- Clear Contact Paper
- Tape
- Xacto Knife
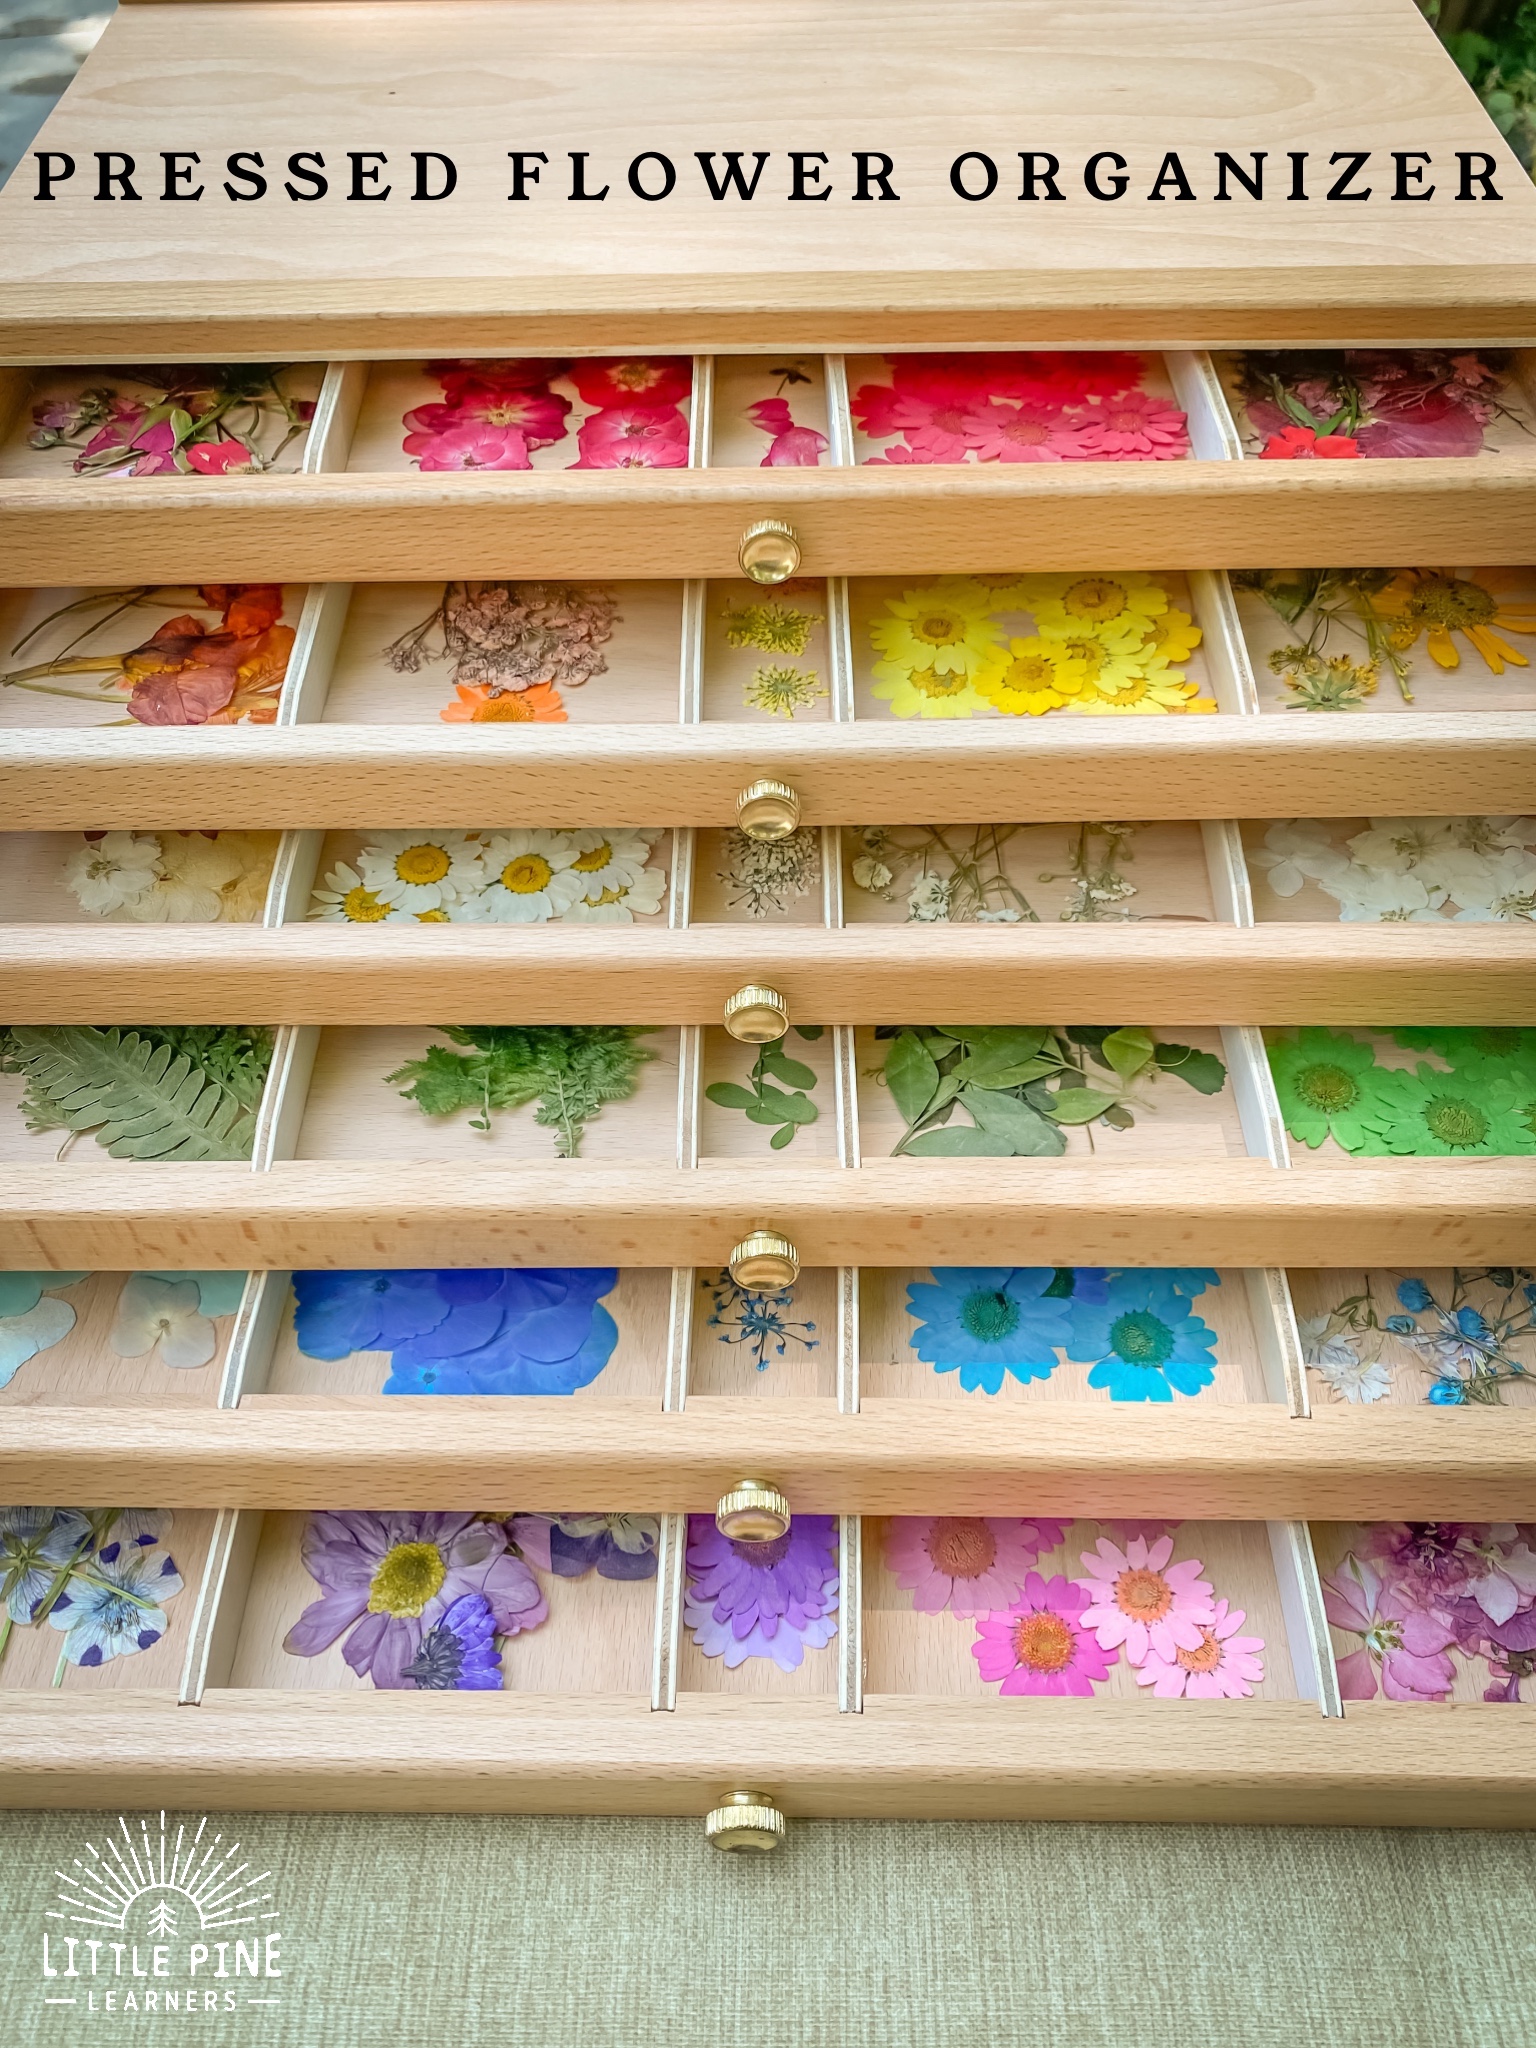
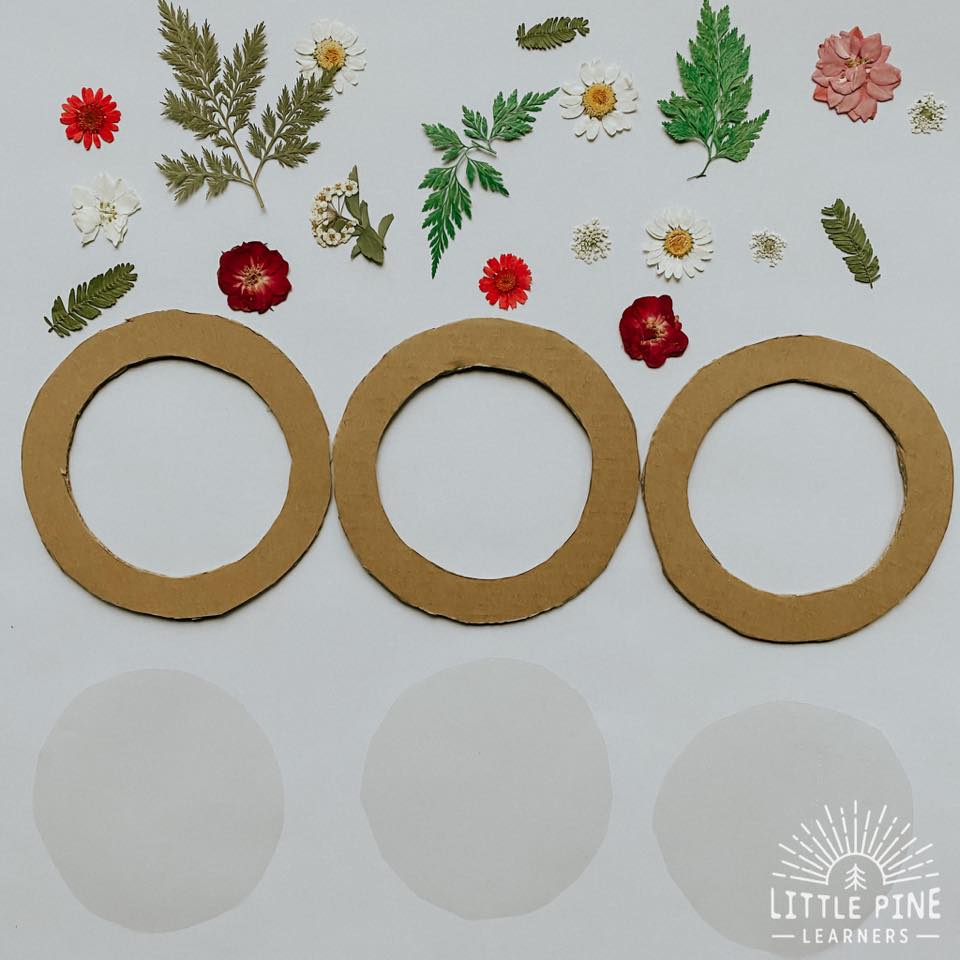
- Pressed pieces of nature– We love that set and have used it for a bunch of nature crafts! You could also use pine needles or other seasonal pieces of nature that are available in your yard!
- Scissors
- Paper Punch
- Twine
- You also might like this beautiful Wooden Pressed Flower Organizer to keep all of your flowers readily accessible.
This post contains Affiliate links for your convenience.
Related: Check out 20+ Pressed Flower Crafts
Here’s How I Made These Nature Ornaments:
Step 1:
Cut out the cardboard borders. I traced two different sized circular Tupperware containers to make my borders. You could make different shapes too! I think ovals, diamonds, or simple triangle shaped trees would also be beautiful!
Step 2:
Cut out your contact paper circles. Here’s a simple hack: I placed a cardboard border under the contact paper sheet as a guide for tracing my circles. You will need two circles per ornament.
Step 3:
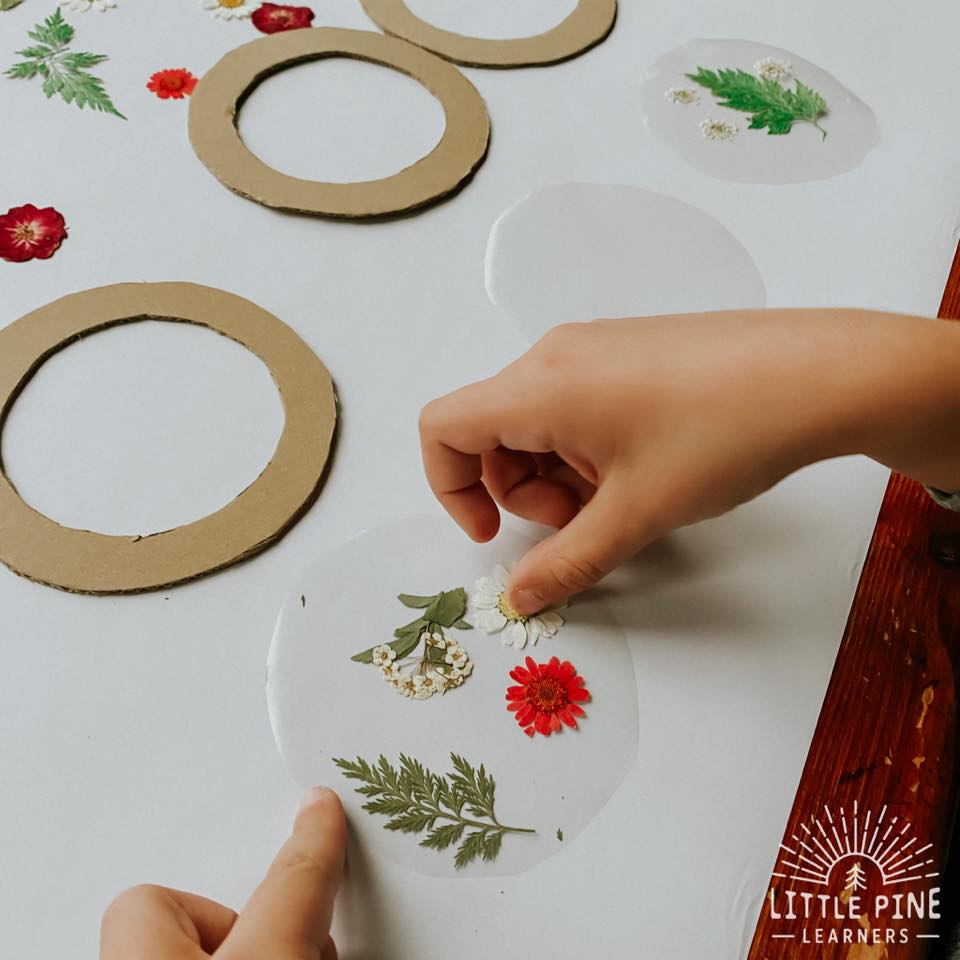
Set up your ornament making station. I set out the cardboard borders, pieces of nature, and contact paper- sticky side up.
Step 4:
Now it’s time to decorate! My boys loved getting creative and decorating their pieces of contact paper. Each nature ornament turned out unique and beautiful.
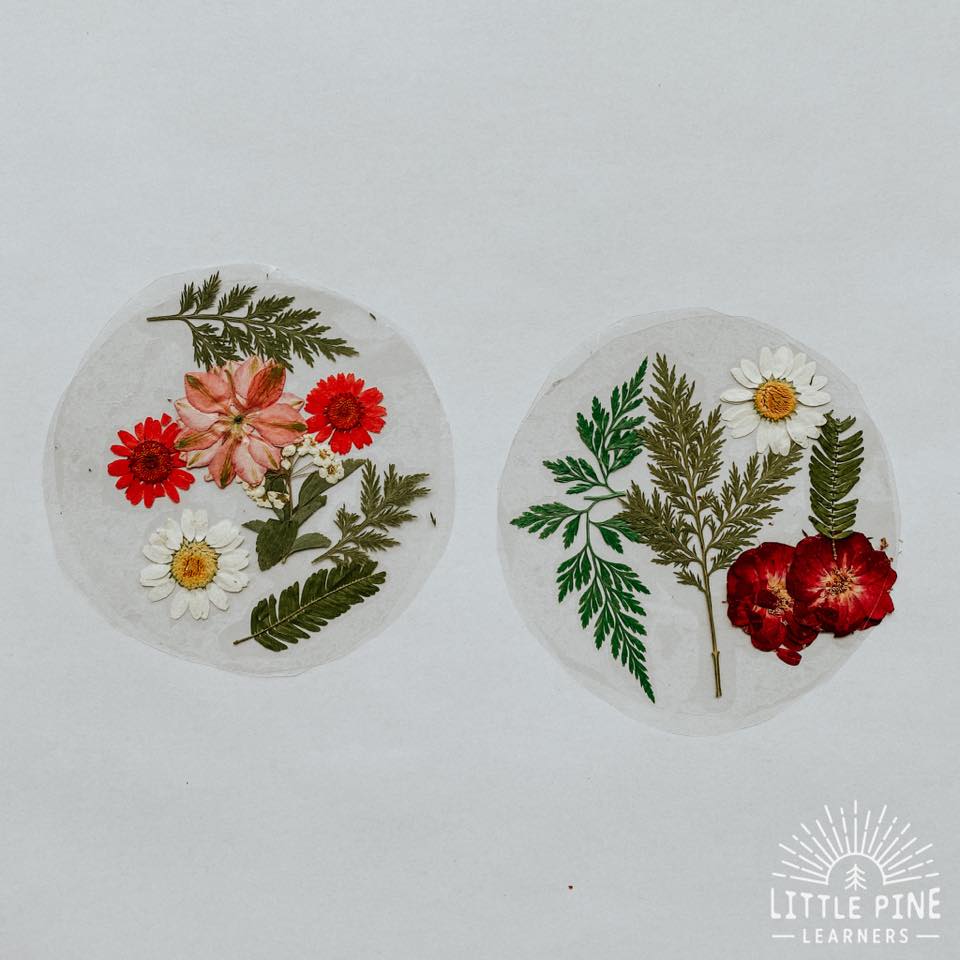
Step 5:
Once the pieces of nature are on the sticky side of the contact paper, seal the pieces of nature with another piece of contact paper. This time, place it sticky side down. As you can see, the circles might not match up perfectly, but that’s ok! Any imperfections here will be hidden behind the ornament.
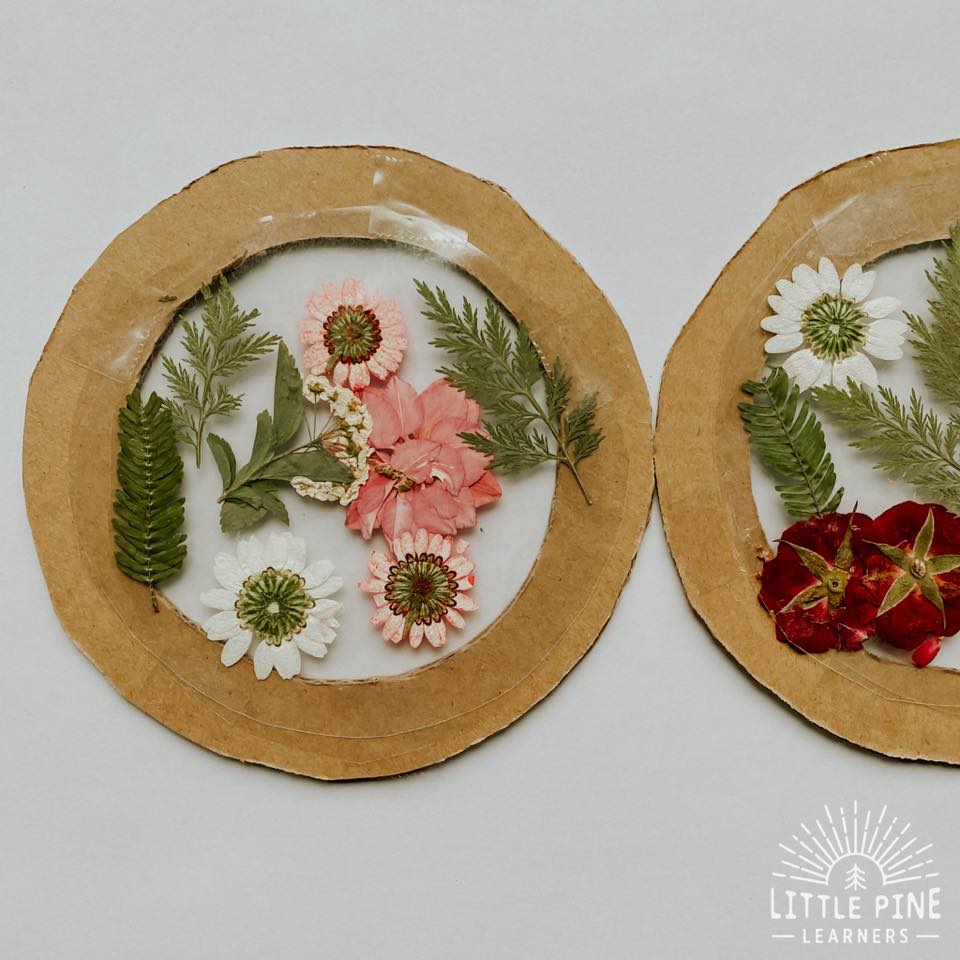
Step 6:
Tape the contact paper circles to the border. This will be the backside of the ornament.
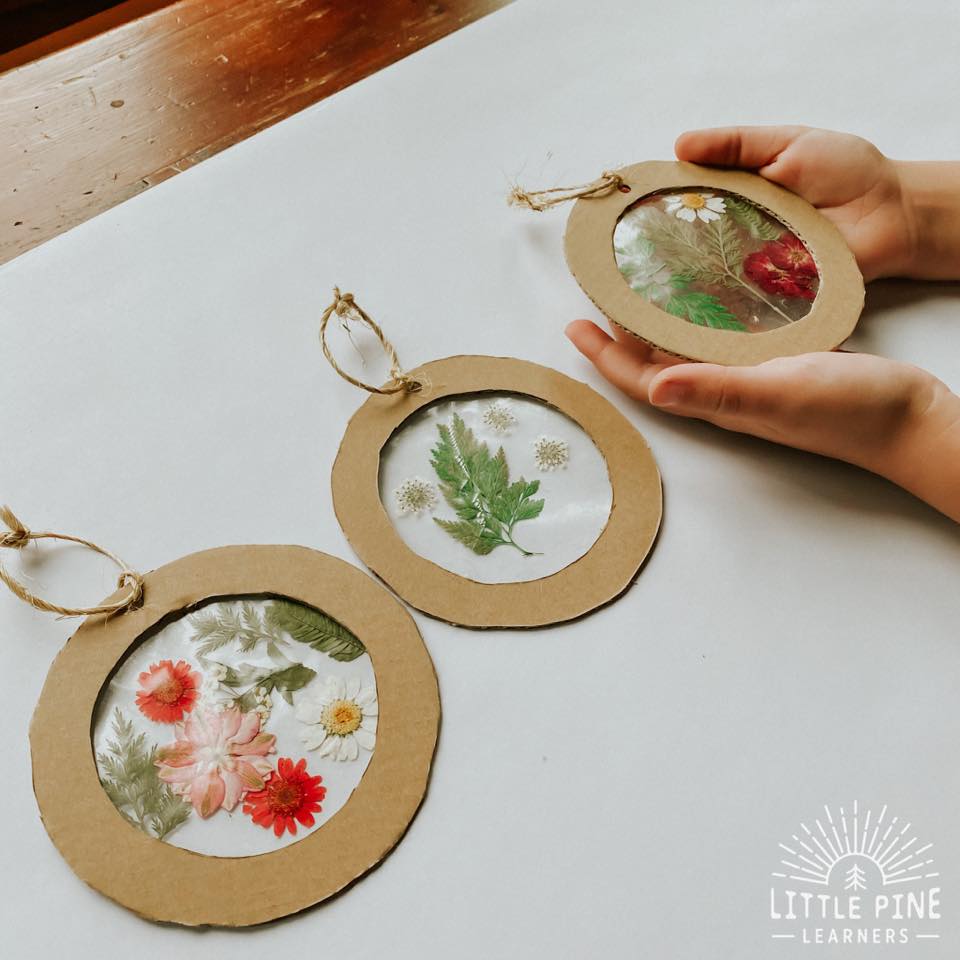
Step 7:
Last, paper punch a hole in the ornaments and tie a string loop through the hole. All finished! Don’t these nature ornaments look beautiful?
These ornaments make the perfect holiday gift, keepsake, and/or decoration! If you use the pressed pieces of nature from the kit that I linked above, the vibrant colors will last forever.
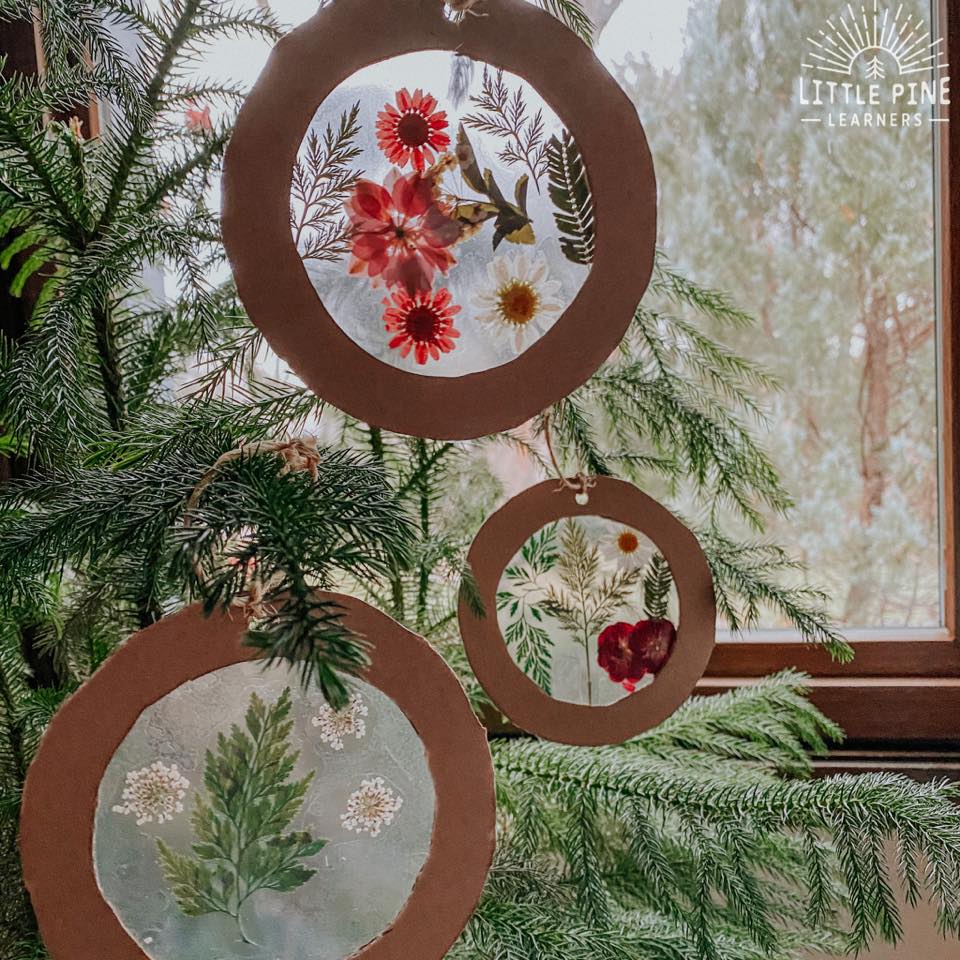
I love how the sunlight shines through them! They look like sun catcher ornaments. Turn the Christmas tree lights on at night and they look just as gorgeous in the magical glow.
Pin it and save it for later!
I hope you make a couple nature ornaments this holiday season! I promise, your little nature lovers will love it as much as my boys.
∼Tara